

Artificial intelligence keeps moving forward, and companies like DeepSeek are marking a clear before and after in language model development. With the release of DeepSeek-R1, this startup has managed to position itself as an alternative to giants like OpenAI or Meta. In this article you’ll learn how to self-host the DeepSeek-R1 model on your own server using Ollama and Open WebUI, two tools that make deploying and reaching advanced AI models straightforward. And a warning that shapes half this article: the model you are about to download is not the one you think, and neither is its license. I spell it out below, before you build anything on top of it.
Introduction to DeepSeek AI
DeepSeek is a startup that has built advanced large-scale language models such as DeepSeek-V3 and DeepSeek-R1. With 671 billion parameters, DeepSeek-V3 beats models like Meta’s Llama 3.1 and OpenAI’s GPT-4o on benchmark tests.
For its part, DeepSeek-R1 has shown impressive performance on mathematical reasoning and programming tasks, which makes it an ideal pick for developers and AI enthusiasts looking to self-host their solutions.
DeepSeek-R1, the large 671-billion-parameter model, is indeed MIT, one of the most permissive licenses there is. With that specific model you can:
- Use the model freely.
- Modify the source code to fit your own needs.
- Distribute applications built on the model.
- Use it commercially to build products or services that make money.
Careful: not every variant is MIT
That is the large model. But ollama run deepseek-r1 does not download that one, it downloads a much smaller distilled version, and the licenses do not carry over the way you would expect. Straight from DeepSeek’s own documentation:
| Variant | Derived from | Actual license |
|---|---|---|
| 671b | DeepSeek-R1 | MIT |
| 1.5b, 7b, 14b, 32b | Qwen 2.5 | Apache 2.0 |
| 8b (the default download) | Qwen3-8B-Base | Apache 2.0 |
| 70b | Llama 3.3 | Llama 3.3 license |
The difference is not academic. Llama licenses are not free software licenses: they come with an acceptable use policy and require you to display “Built with Llama” in your product. Apache 2.0 is a free license, but it still requires you to keep the copyright notices and state your changes. If you are building something commercial on top, check the license of the exact variant you downloaded, not the one in the article title.
Update note (August 2026): DeepSeek-R1 has gone roughly a year without
an update in the Ollama library—the last one was the R1-0528 revision—and
DeepSeek has moved on to other model lines. It’s still perfectly usable, and more to the
point, the procedure in this tutorial works just the same for any other
model: just change the name in the ollama run command.
Why Self-Host DeepSeek AI?
Self-hosting an AI model has some significant advantages:
- Full Control: Set up and customize the deployment to match your specific needs.
- Privacy and Security: Hosting locally gives you complete control over the data being processed.
- Long-Term Cost: The upfront investment can be high, but over time you cut down on cloud subscription costs.
- Freedom to Innovate: you can build on top without asking anyone for permission, as long as you respect the license of the specific variant you download, which is not always MIT.
That said, there are downsides too, such as the technical requirements and the ongoing server maintenance.
System Requirements
Hardware
These requirements are for the variant this tutorial installs, the 8-billion-parameter one that ollama run deepseek-r1 pulls. The full 671-billion model is 404 GB of download alone and will not fit in a homelab: there is a table further down with what each variant needs.
- RAM: 16 GB minimum.
- Processor (CPU): Intel i7 or AMD Ryzen 7, 8th generation or newer.
- Graphics Card (GPU): An Nvidia RTX 3060 or better with at least 12 GB of VRAM is recommended.
Note: This tutorial uses a setup without a GPU, with limitations I’ll explain further on.
Software
- Operating System: Ubuntu 22.04/24.04 or Debian 12.
- Ollama: The tool for running language models.
- Docker: To deploy Open WebUI, a graphical interface that makes interacting with the models easier.
Tutorial: Self-Hosting DeepSeek AI Step by Step
In this tutorial we’ll deploy the DeepSeek-R1 model using Ollama and Open WebUI.
Step 1: Set Up Your Server
This tutorial is designed to run on any server, physical or virtual.
Note: In my case I’ll use a Proxmox container (CT) to walk through the process for teaching purposes. That said, it isn’t ideal for a production environment, since a CT can run into performance limits.
Step 2: Install Ollama
Update Your Operating System:
sudo apt update && sudo apt upgrade -yInstall the Required Dependencies:
sudo apt install -y curlDownload and Install Ollama:
curl -fsSL https://ollama.com/install.sh | shWhat does this command do?
- Downloads an installation script from Ollama’s official site.
- Runs it as is, without verifying any signature or checksum. This is the usual way to install Ollama and the one their own docs give, but it is worth knowing that you are trusting the domain and the certificate, nothing more.
- Runs it to install the tool on your system.
Configure Ollama to Accept External Connections:
By default, Ollama only listens on localhost. We need to let Docker and Open WebUI talk to it, though.
Get your local IP with this command:
ip aIn my case it’s:

Edit the service file:
sudo nano /etc/systemd/system/ollama.serviceModify the [Service] section so Ollama listens on your local IP:
Add Environment=”OLLAMA_HOST=192.168.101.215″ (replace it with your own IP)
[Unit]
Description=Ollama Service
After=network-online.target

[Service]
ExecStart=/usr/local/bin/ollama serve
User=ollama
Group=ollama
Restart=always
RestartSec=3
Environment="PATH=/usr/local/sbin:/usr/local/bin:/usr/sbin:/usr/bin:/sbin:/bin:/usr/games:/usr/local/games:/snap/bin"
Environment="OLLAMA_HOST=192.168.101.215" # Replace with your IP

[Install]
WantedBy=default.target
Why not leave it on localhost?
By default, Ollama listens only on localhost, which means it can only be reached from the server it’s installed on. In our case that isn’t enough, because we want Open WebUI, which runs inside a Docker container, to be able to talk to Ollama.
Docker containers run on a network separate from the host system, so localhost won’t be reachable from inside them. By pointing OLLAMA_HOST at the server’s local IP address (192.168.101.215, for example), we let Open WebUI interact with Ollama and drive the DeepSeek-R1 model from a graphical interface.
Reload and Restart Ollama:
sudo systemctl daemon-reload
sudo systemctl restart ollama
sudo systemctl enable ollama
Check That Ollama Is Running:
sudo systemctl status ollamaIf everything is fine you should see something like this:

Step 3: Browse and Download the DeepSeek-R1 Model
Before downloading the model, it’s worth browsing what’s available and picking the one that best fits your needs. Ollama offers an extensive library of models covering all kinds of use cases, from natural language processing to coding tasks.
Which One You Are Actually Downloading
It’s worth being precise here, because this is the single most common source of
confusion: ollama run deepseek-r1, with no suffix, downloads the 8B
version (5.2 GB), not the 671-billion-parameter model the introduction talks
about. That one weighs 404 GB and it is not going to run on your
homelab.
The 8B model is still a very capable reasoning model for personal use, and it is what most people actually want, but it is only fair to know what you are installing. These are the variants, with the suffix you need to add to the command:
| Command | Download | Where it fits |
|---|---|---|
deepseek-r1:1.5b | 1.1 GB | CPU or a modest GPU; good for testing |
deepseek-r1:7b | 4.7 GB | 8 GB GPU |
deepseek-r1 (default) | 5.2 GB — 8B | 8 GB GPU; the sensible balance |
deepseek-r1:14b | 9.0 GB | 12 GB GPU, such as the RTX 3060 |
deepseek-r1:32b | 20 GB | 24 GB GPU (RTX 3090 / 4090) |
deepseek-r1:70b | 43 GB | Two GPUs, or a single 48 GB card |
deepseek-r1:671b | 404 GB | Out of reach for a homelab |
The rule of thumb: what limits you is not system RAM, it is the VRAM on your graphics card. The model has to fit in it, with some room to spare for the context. If it does not fit, Ollama splits the work with the CPU and speed collapses. It still runs, but you go from tens of words per second down to a handful.
One honest note about this tutorial: the demo runs in a Proxmox container with no GPU. That is fine for showing the procedure and for the 1.5b model, but do not expect those speeds. With a GPU it is a different story.
Check the Available Models
Visit the Ollama Model Library to browse the full list of models, their descriptions and use cases.
For this tutorial we’ll use the DeepSeek-R1 model because of its excellent performance on reasoning and coding tasks. You can pick a different model from the library if another one suits you better, though.
Download the Model:
Set the Environment Variable and Run the Command:
export OLLAMA_HOST=192.168.101.215
ollama run deepseek-r1
Why this command?
export OLLAMA_HOST=192.168.101.215: Sets the IP address where the Ollama client will connect to the Ollama server, so the two can talk to each other. (Remember to swap 192.168.101.215 for your own IP)
ollama run deepseek-r1: Downloads and starts the DeepSeek-R1 model on your server.
This is the simplest approach, since it only takes two commands in a row and doesn’t require touching any system configuration files. On top of that, setting the environment variable this way guarantees the Ollama client points at the right server while the model runs.
Advantages of This Method
- Simplicity: Easy to follow, just two commands.
- Speed: No extra changes to the system configuration.
- Control: The environment variable only affects the current session, so it won’t conflict with other applications.
Additional Considerations
- Persistence: The environment variable is set for the current session only. If you close the terminal and open a new one, you’ll have to export it again to run more Ollama commands.
- Frequent Use: If you plan on using Ollama regularly, consider adding the line
export OLLAMA_HOST=192.168.101.215to your shell configuration file (such as~/.bashrcor~/.zshrc) so it’s set automatically in future sessions.

Look closely at the screenshot: it says 4.7 GB, not 5.2. And in the Open WebUI model picker further down you will see deepseek-r1:latest 7.6B. That is not a slip: when I recorded these screens, latest pointed at the 7B variant. Today it points at the 8B one. Nobody touched anything on my server and the model changed anyway, which is exactly why you are better off spelling out the suffix you want instead of leaving it to chance.
If you want to reproduce these screenshots exactly, the command is ollama run deepseek-r1:7b. If you prefer what ships by default today, ollama run deepseek-r1:8b. Either works for the rest of the tutorial.
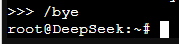
You can now interact with DeepSeek-R1 straight from the command line using Ollama. That’s handy for quick tests or basic integrations without needing a graphical interface. For example:

Type /bye to end the session
Check the Downloaded Models:
Once it’s downloaded, you can confirm the model is available on your system with:
ollama list
Step 4: Install Docker
To deploy Open WebUI and the other containers we need, let’s first make sure Docker is installed on your server. If you already have it, skip ahead to the next step. If not, check our dedicated post for a more detailed walkthrough: How to Install Docker and Docker Compose on Linux: Step-by-Step Guide.
Download and Install Docker:
curl -sSL https://get.docker.com | shAdd Your User to the Docker Group:
To avoid typing sudo on every Docker command, add your user to the docker group:
sudo usermod -aG docker $USER
newgrp docker
A note on the Open WebUI license. It is worth knowing about, because it has changed: Open WebUI is no longer distributed under BSD-3 but under a license of its own, the “Open WebUI License”, which is not OSI-approved. For personal use nothing changes, but it does include one specific clause: you may not remove or replace the “Open WebUI” branding on deployments serving more than 50 users in 30 days, unless you have explicit permission or an enterprise license. Ollama and the model itself remain entirely free; the caveat applies only to the interface.
Step 5: Deploy Open WebUI with Docker
Run the Open WebUI Container:
docker run -d
  -p 8080:8080
  -e OLLAMA_BASE_URL=http://192.168.101.215:11434
  -v open-webui:/app/backend/data
  --name open-webui
  --restart always
  ghcr.io/open-webui/open-webui:main
Remember to replace OLLAMA_BASE_URL=http://192.168.101.215:11434 with your own IP
Check the Container:
docker ps
Step 6: Access Open WebUI
Open Your Browser:
Go to http://192.168.101.215:8080 (replace it with your local IP).

Create your account and log in
Select the Model:

In the Open WebUI interface, pick DeepSeek-R1 from the dropdown menu and start chatting with it.

Before You Expose Anything: the Ollama API Has No Authentication
This has to be said before the next step, because it changes how you should approach it:
the Ollama API has no authentication of any kind. Anyone who can reach port
11434 can use your model, pull down others, delete the ones you have and burn
through your hardware. There is no username or password in the picture: if the port is
reachable, the service belongs to whoever finds it.
This is not theoretical. In January 2026 hundreds of thousands of Ollama servers were counted reachable from the internet, and CVE-2026-7482, nicknamed “Bleeding Llama” and scored 9.1 out of 10, let an unauthenticated attacker read the memory of the process: conversations, system prompts, environment variables and API keys for other services. It was fixed in version 0.17.1, so the first thing to do is check that you are not running anything older:
ollama --version
The three rules, in order of importance:
- Ollama never gets exposed. Port 11434 stays on the local network or, better still, on loopback. What you publish is Open WebUI, which does have accounts and passwords.
- No
OLLAMA_HOST=0.0.0.0. That is the setting found on the majority of compromised servers. If another machine needs to talk to Ollama, give it that machine’s specific IP, not every address on the box. - Authentication in front, always. A tunnel or a reverse proxy gives you remote access, not security. If you publish Open WebUI to the outside world, put Cloudflare Access or an equivalent in front of it, on top of its own login.
Step 7: Take DeepSeek AI to the World: Secure Remote Access
If you want your DeepSeek AI model reachable from anywhere, there are several setups we’ve covered in other tutorials. They all give you secure remote access, and they let you tailor the deployment to what you need.
1. Use the Tor Network for Private Access
Want to keep your model reachable only through an anonymous, secure environment? The Tor network is ideal for that. Set up your internal services on Tor by following our guide:
Global, Private Access: Set Up Your Internal Services on the Tor Network
2. Connect Your Model with a Cloudflare Tunnel
If you’re after a free, secure way to expose your model to the internet without opening ports on your router, Cloudflare tunnels are an excellent option. Here’s how to set them up:
Connect Your Internal Services to the Outside World Without Opening Ports: How to Use a Cloudflare Tunnel (Free!)
3. Set Up Nginx Proxy Manager
For a more advanced solution, you can use Nginx Proxy Manager. This reverse proxy lets you manage access to your model through a graphical interface, which simplifies SSL certificates and custom ports. Follow our guide to install it:
How to Install Nginx Proxy Manager in a Docker Container: Complete Guide
4. Running It in a Virtualized Environment with Proxmox
If you’re just trying DeepSeek AI out as a hobby or in a learning environment, I’d recommend Proxmox VE. It’s ideal for creating and managing containers or virtual machines, keeping your model isolated in a safe environment. These tutorials walk you through setting it up from scratch:
- Proxmox from Scratch: The Complete Guide to Getting Started with Virtualization on Proxmox VE
- How to Install Proxmox VE from Scratch: Step-by-Step Guide
Making your model reachable from anywhere doesn’t just make your setup more versatile, it also opens the door to experimenting with more advanced configurations.
For more detail on each approach, take a look at the linked tutorials and go with whichever one lines up best with your goals. 🚀
Conclusion
With this guide you’ve learned how to self-host the DeepSeek-R1 model on your server, setting it up step by step with Ollama and Open WebUI. This setup lets you explore what an advanced AI model can do while keeping full control over your data and tailoring the deployment to your needs.
And with the licensing caveats above in mind, you are free to build on this model for personal or commercial projects, which opens up no end of possibilities:
- Developing custom virtual assistants for your company or your own projects.
- Building specialized tools, such as coding, logical reasoning or data analysis applications.
- Creating commercial AI-based services you can monetize.
Don’t forget that you can download and manage several models from the Ollama library and combine their strengths as your projects require. Use DeepSeek-R1 for reasoning tasks, for instance, and pair it with models like Llama 3 or Phi 3 to cover other areas of your solution.
And this is only the beginning. Having full control over models like DeepSeek AI puts you in a great position to lead AI innovation projects. There’s no limit to what you can build!
Questions or suggestions? Leave them in the comments and I’ll be glad to help! 🚀
If you want to go a step further and interact with AI models from WhatsApp, Telegram or Slack, check out how to install OpenClaw, a personal AI assistant you can connect to DeepSeek as a local backend.