

Managing proxies and SSL certificates efficiently is essential to keeping your web services secure and reachable. Nginx Proxy Manager (NPM) is a powerful tool that simplifies reverse proxy administration and SSL certificate management. Whether you are running multiple applications on a Linux PC, a virtual machine (VM), a Raspberry Pi or even an LXC container on Proxmox VE, NPM gives you an intuitive interface to centralize and streamline your network configuration.
Why Install Nginx Proxy Manager?
Before we dive into the installation steps, let’s look at a few practical use cases that show why NPM can be an invaluable addition to your infrastructure:

1. Centralized Access to Multiple Applications
Imagine you have several web applications running in different containers or on different machines, each listening on its own port or even on a different internal IP address. Without NPM, you would have to reach each application by typing the IP and the port in your browser, for example:
http://192.168.1.100:8080for your management application.http://192.168.1.100:9090for your admin panel.
With NPM you can simplify all of that by using domain names (FQDNs). You set up domain-based forwarding so the only thing you have to type in your browser is the domain name:
https://gestion.yourdomain.comforwards tohttp://192.168.1.100:8080.https://admin.yourdomain.comforwards tohttp://192.168.1.100:9090.
2. Less Firewall Complexity

Without NPM, reaching multiple applications from outside means opening several ports on your firewall and writing forwarding rules for each one. That complicates administration and widens your attack surface.
With NPM you only need to open the standard ports (80 and 443) on your firewall. NPM takes care of routing internal traffic to the right application based on the requested domain. This simplifies the firewall configuration and reduces the security risks that come with opening multiple ports.
3. Simplified SSL Certificate Management

NPM makes it easy to obtain and automatically renew Let’s Encrypt SSL certificates for every domain you configure. That removes the need to manage individual certificates by hand and keeps all your applications protected with secure connections at all times.
1. What Is Nginx Proxy Manager?
Nginx Proxy Manager (NPM) is an easy-to-use web interface for managing reverse proxies with Nginx. It lets you set up and administer proxies, SSL certificates and redirect rules without deep Nginx knowledge. Its standout features include:
- Simple reverse proxy management: Route traffic to different internal services.
- Let’s Encrypt integration: Get and automatically renew free SSL certificates.
- Intuitive interface: Manage every setting through a friendly web UI.
- Support for multiple users and permissions: Control who can access and change the configuration.

2. Prerequisites
Before you start, make sure you meet the following requirements:
- Operating system: A supported Linux distribution (for example, Ubuntu 22.04, Debian 11, etc.).
- Docker installed: You will need Docker to run NPM.
- Docker Compose installed: It makes managing multiple Docker containers much easier.
- Terminal access: To run the commands needed during the installation.
- Internet connection: To download the required images and packages.
Note: In my case I will be installing NPM in a Proxmox VE LXC container (CT), but the steps apply to any environment that supports Docker: a Linux PC, a VM or a Raspberry Pi.
3. Install Docker and Docker Compose
Nginx Proxy Manager runs on Docker, so you need it installed first. If it is not there yet, the guide on installing Docker and Docker Compose on Linux covers it step by step, including user permissions and a first commented docker-compose.yml. Come back here once docker compose version answers.
4. Set Up Nginx Proxy Manager with Docker Compose
Now that Docker and Docker Compose are installed, let’s configure NPM.
Step 1: Create a Directory for NPM
It is a good idea to keep your configuration files organized in a dedicated directory.
mkdir npm
cd npm
Step 2: Create the docker-compose.yml File
This file defines the services NPM needs, along with its database.
sudo nano docker-compose.ymlCopy and paste the following content into the file:
version: '3.8'
services:
  app:
    image: 'jc21/nginx-proxy-manager:latest'
    restart: unless-stopped
    ports:
      # These ports are in format <host-port>:<container-port>
      - '80:80' # Public HTTP Port
      - '443:443' # Public HTTPS Port
      - '81:81' # Admin Web Port
      # Add any other Stream port you want to expose
      # - '21:21' # FTP

    # Uncomment the next line if you uncomment anything in the section
    # environment:
      # Uncomment this if you want to change the location of
      # the SQLite DB file within the container
      # DB_SQLITE_FILE: "/data/database.sqlite"

      # Uncomment this if IPv6 is not enabled on your host
      # DISABLE_IPV6: 'true'

    volumes:
      - ./data:/data
      - ./letsencrypt:/etc/letsencrypt
Step 3: Start the Docker Compose Services
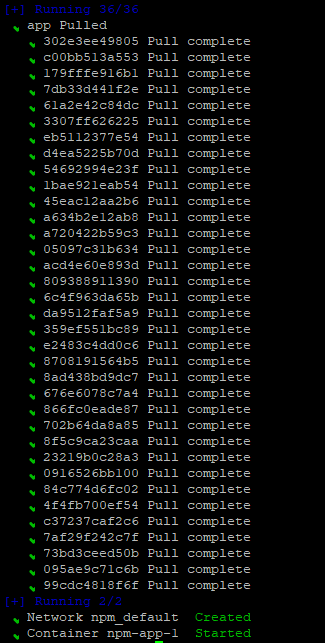
docker compose up -dThis command downloads the required images and brings the containers up in the background.
You should see something like:
Step 4: Check That the Containers Are Running
docker psYou should see the container up:

5. Access and Configure Nginx Proxy Manager
Now that NPM is installed, let’s configure it.
Step 1: Open the NPM Web Interface
From your browser, go to:
http://[Server_IP_Address]:81
If you do not know your IP, use:
ip aIn our case:

So from the browser we go to http://192.168.101.201:81
Step 2: Initial Setup
The first time you open it, you will see the initial setup screen:

- Email:
[email protected](you can change it). - Password:
changeme(change it immediately).
Step 3: Edit the Admin User
Once you log in, you will land on this page. You should change the name, the nickname and the email address to personalize your account and improve security.

Next you will be asked to set a new password. Make sure you use a strong one.

With those changes done, your account is ready and you can move on to configuring proxies.
Step 4: Add a Proxy Host
Go to the Dashboard, then click “Proxy Hosts”

Click the “Add Proxy Host” button.
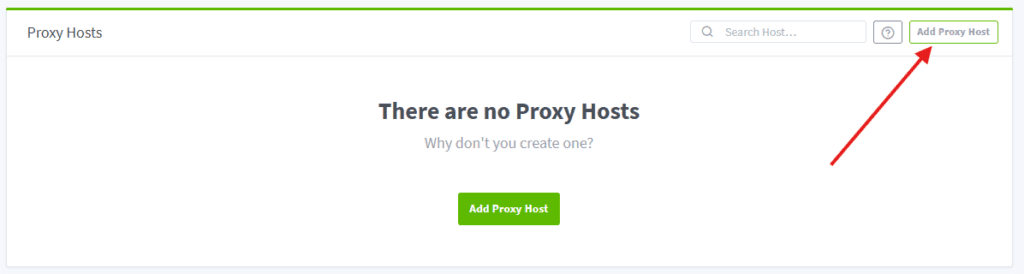
Fill in the information on the “Details” tab:

Domain Names: Specify the domain or subdomain that will be forwarded to your application. In this case we will use plex.itrafa.com.
Scheme: Choose http or https, depending on how your server is configured to listen. For this example we will pick https. Later on you can add an SSL certificate to secure the communication.
Forward Hostname / IP: Enter the IP of the server that hosts your application. For this example we use 192.168.101.222.
Forward Port: Specify the port Nginx Proxy Manager will forward the requests to. In this case, Plex uses port 32400.
Block Common Exploits: Turn this on to block common exploits.
Websockets Support: Enable it if your application uses websockets.
Now click the “SSL” tab and request a new SSL certificate:

Force SSL: Enable Force SSL so that all traffic to this Proxy Host uses HTTPS instead of HTTP. It automatically redirects requests that arrive over HTTP to HTTPS, guaranteeing a secure connection.
Accept the Terms of Service: Check the I Agree to the Let’s Encrypt Terms of Service box to continue with the certificate generation.
Save the changes: Click Save to finish the setup. Nginx Proxy Manager generates the SSL certificate automatically and applies it to the Proxy Host you configured.

Now, when you go to https://plex.itrafa.com, NPM forwards the traffic to the matching internal service (in this case at 192.168.101.222:32400) and handles the SSL certificates automatically.

Important Notes
For this subdomain to work properly on a private network, there are a few things you need to take into account (I will cover them in detail in future posts, but here is the overview):
- Port forwarding on the firewall: You will need to forward http and https traffic (ports 80 and 443) from your public IP to the private IP where the Nginx Proxy Manager server lives.
- DNS record configuration:
- Your main domain needs an A record pointing to your public IP (for example npm.itrafa.com).
- Subdomains (such as
plex.itrafa.com) need a CNAME record pointing to the main subdomain that already points to your public IP (for example npm.itrafa.com).
These steps let subdomain traffic reach the internal services you configured through Nginx Proxy Manager.
For now, this post focuses on installing and doing the basic configuration of Nginx Proxy Manager. Port forwarding and advanced DNS configuration will get their own detailed post later on.
6. Practical Use Cases

Nginx Proxy Manager makes it much easier to manage multiple applications and services on your network, letting you centralize access and improve security. Here are some practical use cases that show how NPM can streamline your infrastructure:
6.1. Integration with Containers and Virtual Machines
NPM fits neatly into environments built on Docker containers or virtual machines, adding an extra layer of management and security. That is especially useful in development and testing infrastructure, where flexibility and security are the priority.
6.2. Role-Based Access
You can set up multiple users with different access levels and permissions in NPM. That is ideal for collaborative environments where different teams need to manage different applications without stepping on each other.
7. Additional Considerations
Compatibility with Different Environments
Although in this tutorial we installed NPM in a Proxmox VE LXC container, the steps are practically identical if you decide to install it on:
- A Linux PC: Follow the same Docker and Docker Compose installation steps.
- A virtual machine (VM): Create a VM with a supported Linux distribution and go through the installation.
- A Raspberry Pi: Make sure you use ARM-compatible Docker images and adapt the
docker-compose.ymlfile if needed.
Security
- Update your containers and applications regularly to stay secure.
- Set up proper firewalls to restrict access to only the ports you need.
- Use valid SSL certificates to secure your connections.
- Configure Access Control Lists (ACLs) in NPM to manage who can reach which services.
8. Conclusion

Installing Nginx Proxy Manager in a Docker container is an efficient and flexible way to manage reverse proxies and SSL certificates across your infrastructure. Whether you install it in a Proxmox VE LXC container, a VM, a Linux PC or a Raspberry Pi, the steps are practically identical, so you get plenty of room to adapt it to your specific needs.
With NPM you can centralize the management of multiple applications, simplify your firewall configuration and secure every connection with automatic SSL certificates. On top of that, its intuitive interface makes administration approachable even if your technical background is limited.
If you are looking for a way to manage your web services centrally and securely, Nginx Proxy Manager is the right choice. Take advantage of Docker to streamline your infrastructure and keep your services available and protected at all times.
Did you find this tutorial useful? Share it and help us keep creating quality content.
Thanks for your support!
Security: First Steps After Installing
Nginx Proxy Manager ships with default credentials ([email protected] / changeme). Change the password and the email address immediately after your first login. If you expose the panel to the internet without changing them, anyone can take over your infrastructure.
An Alternative That Does Not Need Open Ports
If you do not want to open ports on your router, or you cannot (CGNAT, dynamic IP), you can expose your services securely with a Cloudflare tunnel. It is free, it does not require open ports, and it adds DDoS protection. To set up your domain first, follow the guide on how to connect your domain to Cloudflare.
Related Reading
- Install Docker and Docker Compose, a prerequisite for this tutorial
- Install Uptime Kuma: monitor that your proxied services stay up
- Expose services on the Tor network, for maximum privacy without a public domain