

Want to reach your internal applications from anywhere without putting your network at risk? With Cloudflare Tunnels you can connect internal services to the outside world safely and easily. No ports to open on your router, no dynamic DNS (DDNS) to configure, and no constant SSL certificate renewals to worry about.
On top of that, if you run a server on a residential connection with a dynamic IP, where the public address changes often, this approach removes the need to manage extra services like DDNS. Cloudflare takes care of everything from routing to security, so all you have to do is enjoy your services.
Whether you’re running a web server, popular apps like Nextcloud or Home Assistant, a Plex server, or even tools like Uptime Kuma and virtualization platforms like Proxmox VE, Cloudflare Tunnel is an ideal option.
What Is a Cloudflare Tunnel and Why Use One?
Cloudflare Tunnel is a service that creates a secure channel between your internal network and Cloudflare. Instead of opening ports on your router, the tunnel establishes an outbound connection from your private network to Cloudflare’s network. That lets Cloudflare route incoming traffic to your internal services securely, without exposing your network directly to the Internet.
Key Advantages
- No open ports and no DDNS: Ideal for residential connections with a dynamic IP.
- Public IP protection: Your IP address is never visible from the outside.
- Automatic SSL certificates: Cloudflare handles end-to-end encryption with no manual configuration.
- Support for multiple services: Assign a custom subdomain to each application, even if they all use the same port (e.g.
app1.itrafa.com,app2.itrafa.com). - Scalability and flexibility: Perfect for connecting web servers, control panels like Proxmox VE, media apps like Jellyfin, productivity tools like Nextcloud or monitoring services like Uptime Kuma.
- Security and performance: Cloudflare adds protection layers such as bot detection and DDoS mitigation.
Is Cloudflare Tunnels Free?
One of the best things about Cloudflare Tunnels is that it is completely free to use on the basic plan. That means you get every benefit it offers, such as:
- No open ports on your router.
- Protection for your public IP.
- Automatic SSL certificates.
- Secure traffic management with custom subdomains.
- DDoS attack mitigation.
The free plan doesn’t only include tunnels; it also comes with features like Cloudflare Zero Trust, which lets you manage access securely for up to 50 free users.
If you run self-hosted services at home or in a small-scale environment, Cloudflare Tunnels gives you a professional solution at no cost. And if you ever need more users or extra features, you can always move to the paid plans, which scale with your needs.
Popular Use Cases
1. Access to Local Web Servers
If you have an internal web server (Apache or Nginx, for example), you can use a Cloudflare tunnel to make it reachable from anywhere with a custom domain and automated HTTPS.
2. Monitoring with Uptime Kuma
With Uptime Kuma you can monitor your servers and services from a single dashboard. A Cloudflare tunnel lets you reach that dashboard securely from anywhere in the world.
3. Managing Virtualization Platforms
Running Proxmox VE? Set up a Cloudflare tunnel to reach the management console securely from anywhere. Technically you are making the panel reachable from the Internet, but Cloudflare lets you restrict who can get in, adding layers of protection such as automatic SSL certificates, authentication and custom access rules. That gives you complete flexibility to manage your virtual machines and LXC containers without compromising your network’s security.
4. Media and Productivity Apps
Self-hosted services like Plex, Nextcloud, Home Assistant or Bitwarden can also be reached through Cloudflare tunnels, so you can get to your content, documents or smart home settings from any device.
Tutorial: Set Up a Cloudflare Tunnel
In this tutorial we’ll set up a Cloudflare tunnel for a web server running Apache inside an LXC container on Proxmox, on a private network.
Step 1: Check the Local Setup
The server is running on my private network at 192.168.101.52/24. We can confirm that with the command:
ip a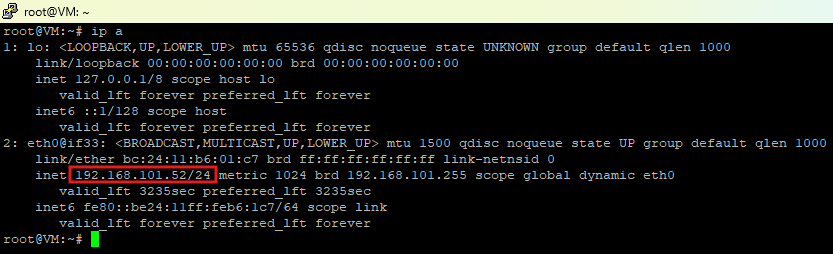
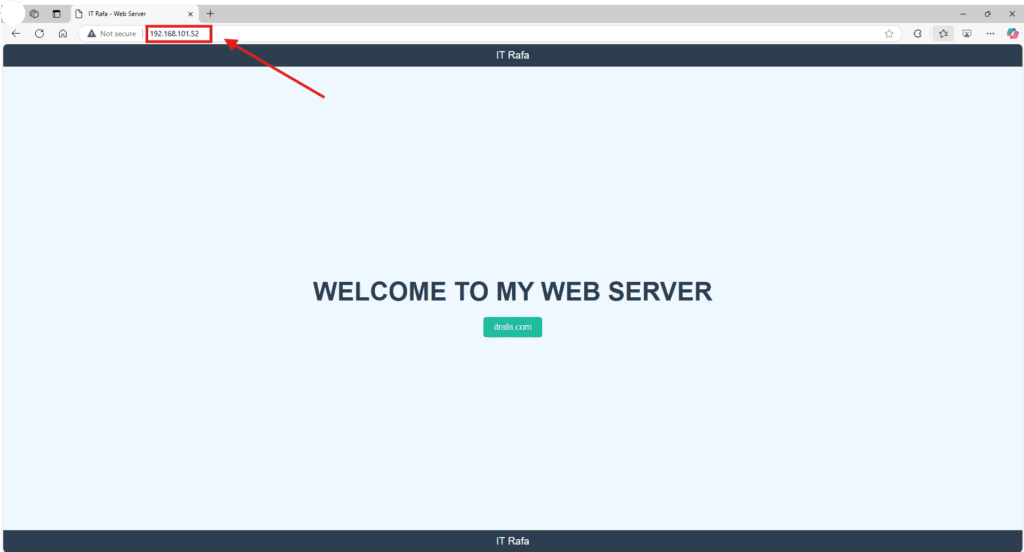
Browsing to 192.168.101.52 from the local network shows the content served by Apache. That server, however, is not reachable from the Internet.
Step 2: Set Up Cloudflare Zero Trust
Cloudflare account and domain
If you don’t have a Cloudflare account yet, or haven’t connected a domain, take a look at our post on setting up a free account and connecting a domain.
Open Zero Trust
In the Cloudflare dashboard, go to Zero Trust.

Set up the free plan
Follow the instructions to complete the initial setup, choosing the free plan. Pick your team name. The «Team Name» in Cloudflare Zero Trust identifies your organization and gives you a unique domain for securely managing how all of your team’s users and devices reach protected resources.

Select the free plan

Next comes payment (don’t worry, it’s free, so the total is 0, but you still have to go through the checkout process and enter payment information).

As you can see, the Cloudflare Zero Trust free plan gives you a 50-user limit, Zero Trust security controls, support for up to 3 network locations, layer 7 (HTTP) filtering rules, support for remote users through WARP, and up to 24 hours of log retention.
Fill in the payment information and click Purchase

Everything is now ready to set up our first tunnel.
Step 3: Configure the Tunnel
Open the Tunnels section
In the Cloudflare Zero Trust dashboard, click Networks and then Tunnels.

Add a new tunnel
Click Add Tunnel.
Choose the tunnel type
In the interface, pick the cloudflared option.

Name the tunnel
Give your tunnel a name and click Save Tunnel.

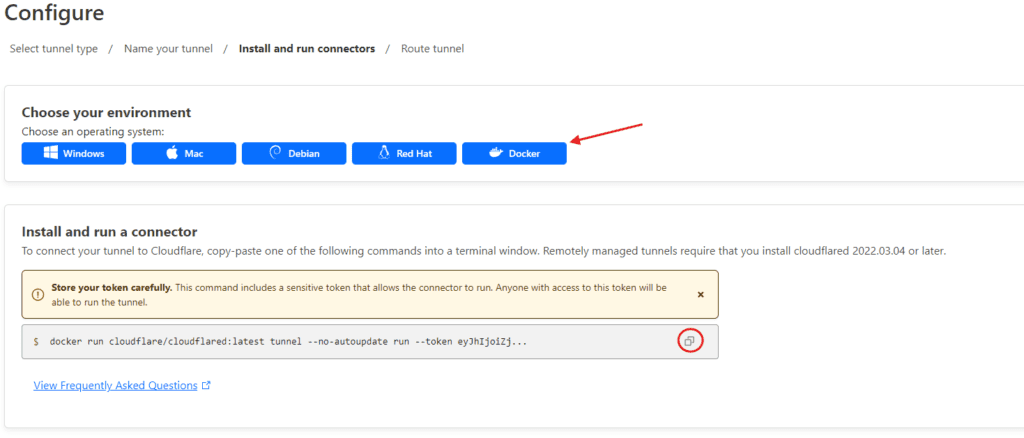
Select the environment (Docker)
In our case we’ll use Docker to run the tunnel. If you don’t have Docker installed yet, check our Docker and Docker Compose installation guide.
Install and run the tunnel in Docker
Cloudflare gives you the commands you need to install and run the tunnel. Copy them and run them on your server. In our case we’ll make one small change to the copied command so it runs in the background (daemon mode) using docker run -d, which leaves it like this:
docker run -d cloudflare/cloudflared:latest tunnel --no-autoupdate run --token ...Run the command on the machine hosting your application (the web server, in this case).

You’ll see that Cloudflare now shows it as «Connected». Click «Next»

Configure the subdomain and the service
Now specify the subdomain you’ll use to reach your service, for example: web.itrafa.online
Internal IP and port: Enter the internal IP of the server running the service, for example 192.168.101.. If the web service listens on the default port (80 for HTTP), you can simply leave it out. If you set up and ran the tunnel on the same machine as the service you want to reach, you could have used 52localhost instead of the internal IP address (192.168.101.52).
Traffic type: Choose whether the internal traffic is HTTP or HTTPS. In our case we picked HTTP.

Save the configuration
Once you’ve entered the subdomain, the traffic type, the IP and the port, click Save Tunnel. Done! Your tunnel is configured and you can reach the service through that subdomain without exposing any ports on your network.
One more note:
If instead of a web server we had, say, a machine running Proxmox VE, which normally listens on port 8006, we could specify that port directly in the URL configuration. That way, instead of browsing to proxmox.itrafa.online:8006, we could simply use proxmox.itrafa.online and Cloudflare Tunnel would route to the right port automatically.
That makes access simpler for users and keeps the experience cleaner and more professional when they interact with your services.

Cloudflare handles the routing to port 8006 without the user having to type it in.
If the service uses HTTPS (as Proxmox does): You need to click the tab labeled “No TLS Verify”.

Why?
Because this is an HTTPS service, TLS verification is done strictly. Enabling “No TLS Verify” tells Cloudflare Tunnel to skip validation of the internal TLS certificate. That helps when you use self-signed certificates, or when validation would break the connection, so the tunnel comes up without problems.
Step 4: Test the Tunnel
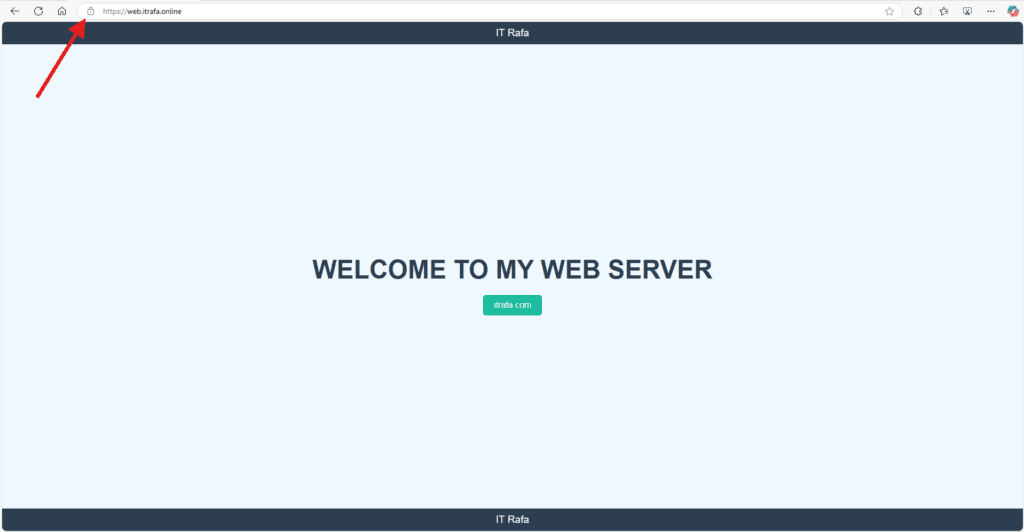
Now open your browser and go to the subdomain you configured. You should see your web server reachable from the Internet, with HTTPS enabled and managed by Cloudflare.
A tunnel is not authentication
The tunnel works now, and it is worth being very clear about what you have just achieved and what you have not. A tunnel solves transport, not access control. It saves you from opening a port on your router and it hides your IP, which is not nothing. But Cloudflare’s own documentation puts it plainly: once you publish a hostname, «anyone can now view your application by going to that address in their web browser».
Translated to what you just built: if you routed the Proxmox panel, it is on the internet right now and the only thing between it and anyone else is your password. That panel controls every virtual machine and container you own. It is not just another service.
The missing piece is called Cloudflare Access, and it is included in the free Zero Trust plan. Ten minutes of work, and it changes your exposure completely: instead of a password, a door that only opens for email addresses you choose.
Step 5: Turn on email code login
It is the simplest login method and needs no external identity provider: Cloudflare emails you a single-use code. It is no longer enabled by default, so you have to add it:
- In the Cloudflare dashboard, open Zero Trust.
- Go to Integrations, then Identity providers.
- Click Add new identity provider and pick One-time PIN.
That is it. The code expires after ten minutes and is single-use: requesting a new one invalidates the previous one.
Step 6: Create the application and its policy
- In Zero Trust, go to Access controls, then Applications.
- Click Create new application and choose Self-hosted and private.
- Select Add public hostname and pick the domain and subdomain you just published through the tunnel. It has to be exactly the same one.
- Under policies, create a new one with the Allow action. In the selector, choose Emails and enter your address. Only yours.
- Set Session Duration. For an admin panel something short makes sense: 24 hours is fine, a week is not.
- Click Create.
The detail that makes this safe: Access applications deny by default. You do not have to write any blocking rule, because anything that does not match an Allow policy is shut out automatically. That is the opposite of a home firewall, where everything passes unless you forbid it.
Step 7: Verify it is actually closed
This step is not optional. A protection you have not tested is not a protection, it is an assumption.
- Open an incognito window and go to your subdomain. You should see Cloudflare’s screen asking for your email, not the Proxmox panel.
- Enter an email address other than the one you allowed. It should reject you.
- Enter yours, get the code and sign in. Now the panel should appear.
If you see the panel straight away on the first check, the application is not covering that hostname. Make sure the name matches character for character the one you published through the tunnel.
One last thing, to close it properly
Access protects the public hostname, but your service still has no idea Access exists: it accepts any request that reaches it. Cloudflare’s documentation recommends closing that gap by validating the application token, and the convenient way is to turn on Protect with Access in the tunnel’s own configuration, so that cloudflared rejects anything that did not come in authenticated.
A note about screenshots: the Zero Trust dashboard has been reorganised several times since this tutorial was written. The menu names above come from Cloudflare’s current official documentation, but if something does not line up, search for the section by name rather than by where it used to sit.
Next Steps
- Install Uptime Kuma
Set up a tunnel to reach the Uptime Kuma dashboard from anywhere. Don’t forget to optimize its data retention. - Connect Proxmox VE through a tunnel
Reach your Proxmox node from anywhere and deploy virtual machines and services in minutes. Follow our Proxmox guides. - Tighten security with Zero Trust
Combine tunnels with Cloudflare Zero Trust access rules to restrict access to specific users or IP addresses.
Conclusion
Cloudflare Tunnels is a complete, secure and free way to expose internal services without compromising your network’s security. With support for multiple applications, automated SSL, no need for DDNS and a free plan that covers most users, it’s an essential tool if you want simplicity and protection at the same time.
If you’re building an ecosystem with tools like Docker, Proxmox or monitoring apps, Cloudflare Tunnel will be a key piece for connecting your services to the outside world securely.
Questions or suggestions? Drop them in the comments and I’ll be glad to help. 🚀
If you need maximum privacy and anonymity rather than convenience, another option is exposing your services over the Tor network as hidden services. It’s slower than Cloudflare Tunnels, but it doesn’t depend on any third party.