

AdGuard Home is a DNS server that blocks ads, trackers and malware at the network level. You don’t need to install extensions in every browser or on every device: everything that connects to your network (PCs, phones, smart TVs, IoT gear) is protected automatically.
Unlike a browser ad blocker, AdGuard Home filters DNS traffic before it ever reaches the device. That means it also blocks app telemetry, smart TV trackers and known malware domains, even on devices where you can’t install extensions.
On top of that, AdGuard Home supports DNS-over-HTTPS (DoH) and DNS-over-TLS (DoT) natively, encrypting your DNS queries so your ISP can’t see which sites you visit. In this guide we install it with Docker Compose and set it up as the main DNS for your whole network.
Why AdGuard Home and not Pi-hole?
Pi-hole is the classic choice for DNS blocking, but AdGuard Home has some clear advantages in 2026:
| Aspect | AdGuard Home | Pi-hole |
|---|---|---|
| Encrypted DNS (DoH/DoT) | Native, no extra config | Needs additional setup |
| Web interface | Modern and responsive | Functional but dated |
| Per-device rules | Yes: block more on IoT and less on your PC | Limited |
| DHCP server | Built in | Built in |
| Updates | Frequent, a single binary | Depends on several components |
| Resource usage | ~30 MB RAM | ~50 MB RAM |
Both are excellent. If you already run Pi-hole and it works for you, there’s no need to switch. If you are starting from scratch, AdGuard Home is the more modern option.
Requirements for installing AdGuard Home with Docker
- Docker and Docker Compose installed
- Port 53 free (DNS). If your server runs systemd-resolved, you’ll need to disable it first (I cover that below)
- A static IP on your server (your network’s DNS can’t change IP)
Step 1: Disable systemd-resolved
On modern Ubuntu/Debian, systemd-resolved takes port 53 by default. AdGuard Home needs that port, so you have to disable it first:
# Check whether systemd-resolved is using port 53
sudo ss -lnp | grep :53

Now disable it:
# Disable systemd-resolved
sudo systemctl disable --now systemd-resolved

# Set a temporary DNS so the server keeps name resolution
sudo rm /etc/resolv.conf
echo "nameserver 1.1.1.1" | sudo tee /etc/resolv.conf
Once AdGuard Home is installed, your server will use its own DNS service.
Step 2: Docker Compose for AdGuard Home
Create the project directory and the docker-compose.yml file:
mkdir -p ~/adguard && cd ~/adguard
services:
  adguardhome:
    image: adguard/adguardhome
    container_name: adguardhome
    restart: unless-stopped
    ports:
      - "53:53/tcp"      # DNS (TCP)
      - "53:53/udp"      # DNS (UDP)
      - "3000:3000/tcp"  # Web panel (initial setup only)
      - "80:80/tcp"      # Web panel (after setup)
      - "443:443/tcp"    # DNS-over-HTTPS
      - "853:853/tcp"    # DNS-over-TLS
    volumes:
      - ./work:/opt/adguardhome/work
      - ./conf:/opt/adguardhome/conf
Bring the container up:
docker compose up -d
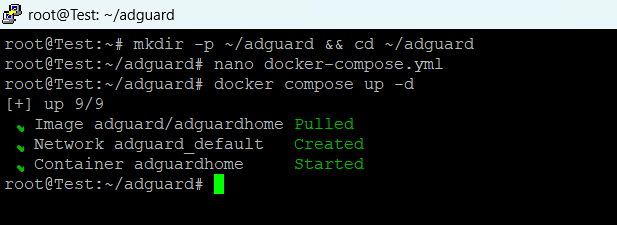
Note: DNS won’t answer any queries until you complete the setup wizard in the next step. That is normal.
Step 3: Initial AdGuard Home setup
Open http://your-server-ip:3000 in your browser. The setup wizard walks you through these steps:

- Listen interfaces: leave the defaults (all interfaces, port 80 for the web UI)
- Credentials: create a username and password for the admin panel

- Upstream DNS: set the DNS servers AdGuard Home will query. Recommended:
1.1.1.1: Cloudflare (fast, private)9.9.9.9: Quad9 (blocks additional malicious domains)

Once setup is done, the panel moves to port 80. Go to http://your-server-ip (no port) and log in with the username and password you just created. Port 3000 is no longer used.


Step 4: Recommended blocklists
AdGuard Home ships with its own default list, but you can add more for wider coverage. Go to Filters > DNS Blocklists > Add blocklist. AdGuard Home gives you two options: “Choose from the list” (predefined lists organized by category) or “Add a custom list” (a manual URL). The easiest route is “Choose from the list”, where you’ll find the most popular lists already categorized. These are the ones I recommend:

- AdGuard DNS filter: included by default, a good baseline
- Steven Black’s Unified Hosts: the most complete one for adware, malware and trackers. URL:
https://raw.githubusercontent.com/StevenBlack/hosts/master/hosts - OISD (Big): an excellent balance between aggressive blocking and few false positives. URL:
https://big.oisd.nl
Tip: start with the AdGuard list plus OISD. If something stops working (a legitimate site getting blocked), add an exception under Filters > Custom filtering rules using the @@||domain.com^ syntax.
Step 5: Set AdGuard Home as the DNS for your whole network
To get every device using AdGuard Home automatically, change the DNS setting on your router:
- Log in to your router’s admin panel
- Find the DHCP settings
- Under primary DNS, enter the IP of the server running AdGuard Home
- Save and reboot the router (or wait for devices to renew their DHCP lease)
From that point on, every device that joins your network gets the AdGuard Home IP as its DNS. Ads, trackers and malware get blocked before they reach the device.
Step 6: Encrypted DNS with AdGuard Home (DoH/DoT)
By default, DNS queries travel in plain text: your ISP can see every domain you visit. To encrypt the queries between AdGuard Home and the upstream servers, go to Settings > DNS Settings > Upstream DNS servers and use encrypted URLs:
# DNS-over-HTTPS (DoH)
https://dns.cloudflare.com/dns-query
https://dns.quad9.net/dns-query

# DNS-over-TLS (DoT)
tls://1dot1dot1dot1.cloudflare-dns.com
tls://dns.quad9.net
After saving, check under Settings > DNS Settings > Test upstreams that the encrypted servers respond correctly.
Verification: is AdGuard Home actually working?
To confirm everything is up and running:
- Open the AdGuard Home dashboard: you should see DNS queries coming in from the devices on your network
- Visit a site loaded with ads: they should be gone
- Check the logs under Query Log: you’ll see which domains get blocked and which get through
- Encrypted DNS test: use Cloudflare’s encryption check to confirm DoH/DoT is working
Monitoring AdGuard Home
If you want alerts for when AdGuard Home goes down (which would leave your entire network without DNS), set up a monitor in Uptime Kuma pointing at port 80 on your server.